The One Where I Heart Raised Beds Even More
.JPG) |
| Who knows what will arise from this plastic wrapper on our drive? |
The main allotment project for 2014 was to install the mother of all raised beds. I wrote about the smaller ones I built last year and they're marvellous. They may be hard work initially - ensuring a plot free of couch grass where they're to go isn't easy, nor is emptying the compost bins required to start them off - but oh, the delight of weeding through soil the consistency of soft butter, when the rest of my plot is hard clay is a complete joy.
I'd come round to thinking I'd like a really big raised bed, so I could try growing the more expansive crops like squash and to try my hand at no-dig spuds like Naomi has already. So you can imagine my joy when the cheerful chaps at WoodBlocX gave me an allowance to choose whatever I wanted from their catalogue. No problem, I'd LOVE a 3 metre x 1.125 metre x 2 BlocX high raised bed please :)
.JPG) |
| The initial 'assembly rehearsal' on our patio |
The kit arrived a while back and NAH's eyes lit up at the prospect of assembling a 'lego kit' for adults. Well, he is an engineer after all and who am I to refuse my usually gardening reluctant husband a bit of fun ;)
How glad I am that Mark, Helen and Andy McIndoe blazed and blogged a trail ahead of us. I could see from their posts that assembly could take quite a bit of time and the more level patio in our back garden might be a better place to do it rather than the allotment.
I put this to NAH and he came up with the idea of assembling the kit in several 'chunks' small enough to fit in my car to take up to allotment, yet large enough so he wouldn't need a lot of time for the final assembly there. Here's a video of him in action (click on this link if the embedded video doesn't work).
Note that we decided not to use the wedges which come with the dowels in the kit. This is so we can easily take the raised bed apart again if I decide to give up the allotment. Using the dowels alone to connect the pieces together still gave us a robust finished product which is sufficient for my needs.
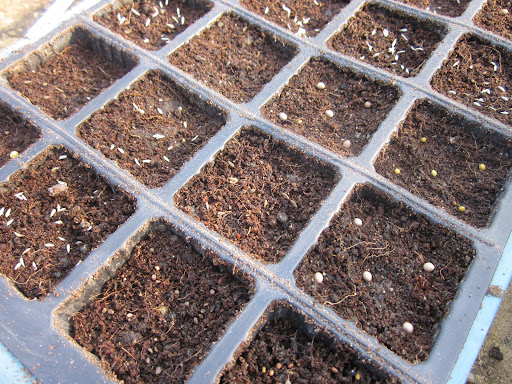
There then followed a long interval whilst I dug all the couch grass and other weeds out of the part of the allotment where the raised bed was to go...
.JPG) |
| Note that NAH does NOT usually wear a cap. It was raining at the time |
... then came the joyous day when NAH finally fitted everything together. In the rain, bless him. He found the whole process pretty easy to do, as you can see from the video. Our only gripe was it would have been easier to have the finished diagram at the end of the sequence in the assembly booklet rather than at the beginning.
I then had to empty two compost bins which wasn't quite as easy, but it was worth it and I counteracted that stiff workout by completing the spud planting bit in a matter of minutes.
My thanks to WoodBlocX for supplying such a fantastic piece of kit. Admittedly it's a bit OTT for an allotment - skip diving and recycling are considered the more usual ways of garnering wood to make raised beds - but I'm delighted with my very swanky version which is built to last. I can make up for things by making something useful out of the pallet upon which the raised bed came - I think a vertical salad planter might be just the thing...
... I also seem to have a few spare bits left over. These are going towards making a smaller raised bed to sit alongside its bigger brother and I'll use various bricks I've acquired along the way to make the other sides.
.JPG) |
| Tah dah! Thanks NAH :) Note this is before I emptied those 2 compost bins into the hungry tummy that is the middle of my new raised bed |
Had I not wanted a humongous raised bed, I'd be tempted to choose a bench cum planter kit for the patio from the website. WoodBlocX's 'lego approach' makes for a most versatile product which brings some quite difficult to do projects within the reach of someone with average DIY skills.
It's not a cheap option (though Getting-A-Man-In for some of these projects would cost even more), but it's a very robust product which looks good. I found communication with the company to be very good (with some additional cheery banter on twitter) and I was also impressed with the company chosen for delivery.


It's fantastic, and lucky you having such a handy husband to help put it together. You're right the seat ones do look brilliant too. I shall look forward to seeing your new raised bed in action. I've got raised beds in the garden, and the soil is always very easy to work.
ReplyDeleteHi CJ - I'm trialling no dig spuds, so expect at least one update on how things are going and a peek at my new raised bed :)
DeleteI have one of these waiting to be constructed for the garden and so it was interesting to read your experiences
ReplyDeleteHi Sue - I hope it proves useful. Looking forward to seeing how you get on with yours.
DeleteThe finished product looks great VP and I'm sure that NAH had fun putting it all together.
ReplyDeleteAnna - I've NEVER known him to volunteer to do a gardening task in the rain ;)
DeleteWhat a great thing to do! Can't wait to see these planters filled with produce!! You ROCK!!
ReplyDeleteOh that is swish, and I know exactly what you mean about the joy of weeding compared to heavy clay. FWIW I have found that covering the area with cardboard and then placing and filling the bed works really well, no couch grass has made it through, apart from occasionally from the sides. Enjoy!
ReplyDelete